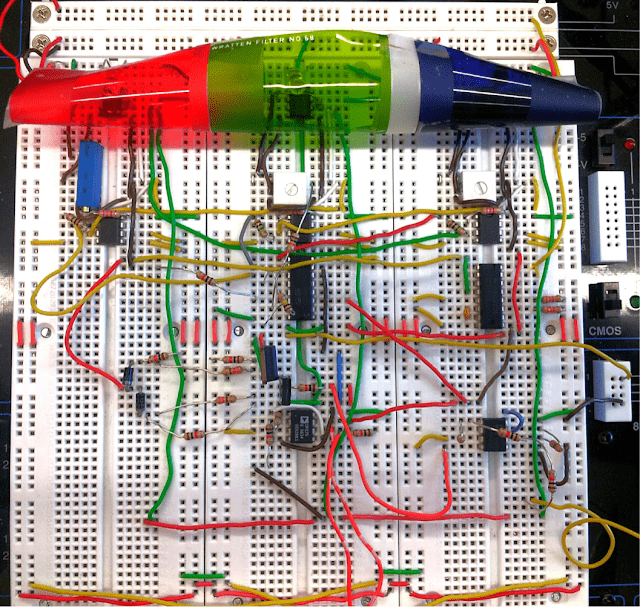
As someone who is colorblind, as well as fascinated by the notion of synesthesia, the idea of “converting” between senses has always seemed interesting. Last year, for example, I worked on a project that used touch sensors to play certain notes at various intensities depending on which sensors were triggered. With this background, I decided upon creating for my Modern Electronics final project a device that would turn color, or the wavelengths of electromagnetic radiation, into sound, or mechanical waves. Notably, I chose to look solely at wavelengths of light that fall within what the human eye can process, what we call visible light. In computer science terms: color input, sound output.
The ideal end goal of the Color-to-Sound project was a device that could be utilized by those of us poorly-endowed with optical cones (or those incapable of vision altogether) to be able to recognize and distinguish colors by their sound signature. My initial, overly simplified notion of how such a device would function was as follows: using three photodiodes, each of which would look at a specific range of colors (red, green, or blue), I would use the voltage coming through each to determine the amount of each color present proportional to the others. Thus, I would be able to measure which colors were present and emit a sound correlated to that particular combination of colors. To carry out the project, I utilized the following parts for the main setup:
- 3x Narrow Acceptance-Angle Photodiode
- 5x Operational Amplifier
- 3x Voltage Comparators
- 1x One-of-Eight Switch
- 1x Voltage-Controlled Oscillator
- 3x 10-Turn Potentiometer
- 1x Large Potentiometer for Volume Control
- 1x Red Filter
- 1x Green Filter
- 1x Blue Filter
- Assorted Resistors & Capacitors
Despite having a rudimentary implementation of the device in my head, a lot of this project came down to figuring out the minute details.
     ⇗  Filter 1 ⇒ Photodiode 1   ⇘

Light ⇒ Filter 2 ⇒ Photodiode 2 ⇒ ✨Magic✨ ⇒ Speaker ⇒ Sound

     ⇘  Filter 3 ⇒ Photodiode 3   ⇗
For example, connecting to the built-in speaker on the Protoboard was simple enough, but putting together the amplifier with the right transistors turned out to be trickier than expected and something I spent a while on. In addition, hammering out the details on how best to utilize the light data taken in by the photodiodes was also a bit murky.
However, this project taught me a lot about “debugging” with circuitry. At times, when I was confused by what was wrong with the project or why some of the chips weren’t working as expected, I learned to question everything about the circuitry: what did I last change? When was it last working? Is the board on? Are the connections good, or did something fall out of place? Test voltages at key points in the circuit. Did I forget to power a particular chip? Etc.
Fortunately, I was able to go by my notes and pictures of the circuits we built in class for setting up most of the chips I used in my project. The one chip I did struggle with setting up was the one-of-eight chip, but after reading through the CMOS Cookbook (an invaluable guide throughout my project) page and with a little improvisation, I was able to utilize the chip as I wanted.
In its finished state, the color-to-sound converter did not work nearly as well as I hoped it would; however, it did excel at recognizing the differences between certain colors such as blue and yellow. Had I more time, I would have liked to expand the range of frequencies the color-to-sound converter used to output. I believe that may have allowed for greater differences in sound between colors. In addition, I would have liked to try scaling the voltage input from each color by a fixed amount, to see what effect that would have on the sounds. Finally, I believe it also would have been interesting to expand the project to detect “invisible” light, such as ultraviolet light.
