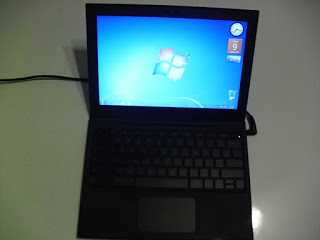
Weeks ago, internet-giant Google introduced its official Chrome OS to developers and the general public so they could test the new operating system and give feedback into its flaws and virtues. By giving away 60,000 Cr-48 laptops, Google ensured its OS and planned hardware could be tested by a wide swath of people to collect feedback. Weeks later, hackers hacked, developers developed, and @Hexxeh worked their magic. Now we have the ability to flash altered BIOS (BIOS's?) onto the Cr-48 and install everything from Mac OS X to Android 2.3, and yes, even Windows 7. Watch Windows 7 on the Cr-48 below, or skip down to the how-to.
In case you are wondering, Google is not against any of these modifications. In fact, they purposely facilitated the hacking of these machines. They basically thought:
Hey, people are gonna do it anyway, why not help them out?
So, with this in mind, I present to you a concise and (I was able to do it, so...) idiot-proof guide to installing Windows 7 on your Cr-48. Note: this voids any warranty you may have, as you must open the laptop's casing in order to disable security features. Major credit to @Hexxeh for making things like this possible.
Side note: Though this guide makes specific references to Windows 7 and Ubuntu, it is applicable for Windows Vista as well as all Linux distributions. Windows XP is very similar.
What you'll need
- Time (about an hour).
- A screwdriver.
- Your Cr-48.
- A Windows 7 .iso file, and a USB, 4GB or larger (alternatively, a USB CD/DVD Drive and Windows 7 Install CD)
Step One
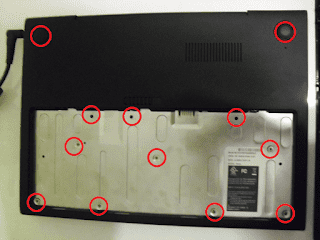
Make sure the laptop is completely off and unplugged before you begin. Then, remove the bottom panel of your Cr-48. Remove the battery out of the bottom of the laptop. This should expose ten (10) screws. Additionally, there are another two (2) screws hidden beneath the rubber feet of the computer. Remove the rubber feet, remove the screws, and you're set. Put these aside, we'll need them for reassembly. Once all 12 screws have been removed, carefully begin to pry apart the casing. Be sure to remove any SD cards first as obstructions will make the case more difficult to remove, and you don't want to damage the parts.
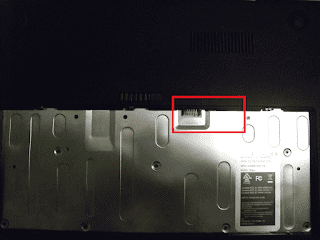
At this point, if you haven't already done so, turn developer mode on. There's a switch behind a small piece of black tape located in the battery compartment. With the battery slot facing you, flip the switch to the left to turn developer mode on.
Step Two
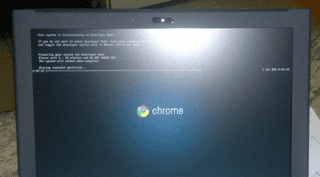
Carefully, plug in the power cord and turn on the computer. You should see a recovery-mode screen. Press Ctrl+D to bypass this screen and boot into developer mode. If this is the first time you boot into dev mode, it will take around 5 minutes while Chrome erases the stateful partition. Don't worry! All your data is in the cloud, remember?
After booting, make sure you can connect to the internet before proceeding.
Step Three
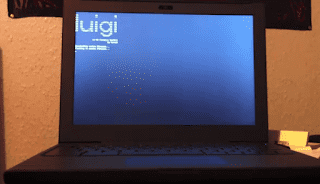
Press Ctrl+Alt+Forward to open the command shell. Log in with the username "chronos" at this point. No password is required. Now that you have entered the shell, the real stuff happens. Thanks to Hexxeh's marvelous program, Luigi, flashing the new BIOS is a very simple process. Simply type in:
wget bit.ly/run-luigi && sudo bash run-luigito flash the new BIOS. Luigi will download, run, and you will be shown a disclaimer. Accept by pressing enter, and you will be brought to the main menu.
Step Four
Press 1 to flash the custom firmware, and then press enter. Once it has flashed, assuming there are no errors, it will ask you to reboot. Press enter, and after rebooting you will find the new firmware has been installed. You can now safely put your computer back together, taking all the same precautions as you did earlier. Snap the bottom panel back into place, screw in the screws, plug in the battery, and you're set.
From here, it's just as simple as installing an OS on any other computer.
Step Five (optional)
Create a bootable Windows 7[Or Linux] USB drive. If you are using a CD/DVD drive, skip to the next step, or read about how to put your Windows 7 CD onto a USB below.
Note: Both 32-bit and 64-bit versions of Windows 7 work, though from what I understand, the 32-bit version leaves you slightly more space to work with. I personally installed 64-bit Ultimate, and it runs mighty fine.
If you purchased a copy of Windows 7 online, Microsoft created a tool that allows you to easily burn the copy onto a USB. Said software can be found here.
If you only have an otherwise-obtained Windows 7 ISO file, you can try the tool as well, though users have had varying degrees of success. Alternatively, you can burn the ISO onto a DVD and try this method to put it on a USB.
Linux users, don't worry about size, go for 64-bit. Ubuntu takes very little room: Follow the standard procedure for putting the Ubuntu ISO onto your USB.
Step Six
Plug in your bootable USB to the Cr-48, or connect your CD/DVD drive with the disc inside.On startup, repeatedly hit F10 [the Volume Up key] to get to the boot menu. There, choose to boot from your USB/DVD rather than the SSD. The installation is just about standard from this point on. When asked you where you want to install Windows, delete each of the smaller (12 or so) partitions by going to the "Advanced" option. Then, create a large partition using the whole SSD, and install there.
On Linux, just let the installer handle the partition; hit the option that reads something like "Use entire disc", and you should be set.
Step Seven (Windows only)
You may or may not encounter this same problem I did, but if your computer's display looks strange, seems to have a weird resolution, or your mouse pad does not work, simply install updated drivers via the Device Manager tool in Windows 7. This is as simple as hitting Start, Control Panel, Hardware and Sound, Device Manager, and updating both the Display adapter and Mouse drivers. If Aero does not work on your computer, go to Start, type in Aero, and hit the "Troubleshoot" option and follow instructions. Should work perfectly from then on (though the clickpad is funky, even with updated drivers).
All done!
Well, I hope by now you have a working copy of Windows 7 or Linux on your Cr-48. Mine works great, though I'm personally going back to Chrome OS now that I remembered how much I hate Windows.

